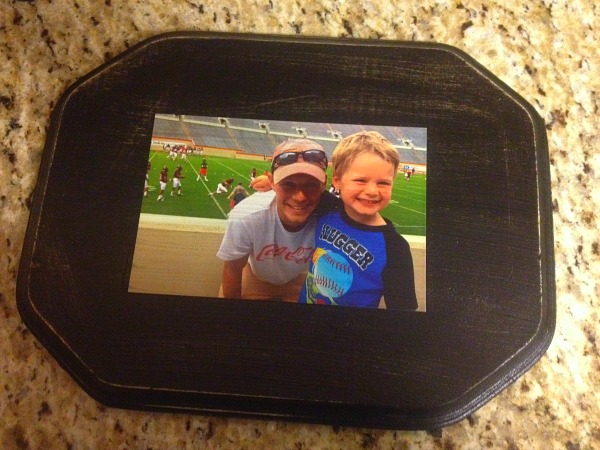
Need a frugal Christmas gift? I have a great little craft for you today or you can also browse the budget gift basket range at Hamper Creations Christmas hamper baskets.
But wait!!!! Come back!! If you don’t bleed sparkles and glitter or needlepoint in your sleep, have no fear! Anyone can do this!
How do I know that? Oh, because I’m the most un-artsy mom God ever made. If you don’t believe me, look at my living room. I can cook. I can blog, I can remain calm when someone throws up on me (which truly is a skill to be noted). But crafts? And decorating? And scrap-booking? Oh, stop! Just stop.
Y’all, if I say this is easy, it’s easy. And it turned out great!
Here’s what you need for your photo gift:
- a piece of wood, in a nice shape (we found inexpensive ones at Hobby Lobby)
- all-purpose acrylic paint
- sponge brushes
- matte-finish Mod Podge (I think of this as a fancy-shmancy Elmer’s glue.)
- a printed picture (I used a 4 x 6)
- sandpaper (optional)
- a mounting bracket
Here’s how you do it:
First, find a group of friends. Everything is cheaper in bulk, and it’s just way more fun to do crafts with others. My cousin (who is the artsy one) rounded up all the supplies for us ahead of time. Then we each picked out a frame, and if you need a photography for the frame and you have a jewelry photograph, you can use a service like a jewelry retouching service to make this photo look at his best.
Then we chose our paint color. My cousin pointed out that I should probably go with a color that was actually in my picture, instead of the hot pink and purple I was drawn to. Go figure.
Then paint your frame. If you tend to be a bit messy (ahem) you may want to lay down some newspaper or plastic tablecloth prior.
Once it’s painted, you have to wait. If you’re doing this alone, go do laundry, or something else boring like sweeping the kitchen for the 86th time today. But, of course if you’re with your friends, you can just go have some appetizers.
I think you know which is the right answer.
Okay, once the paint is dry, you may want to “antique” it. Don’t worry, I didn’t really know how to do this, either. Apparently it means you rub the edges with some fine sandpaper.
I got really good at it. See how fast I’m moving? Crazy, I know.
Now it’s time to place your picture on the frame. Dab your sponge in Mod Podge and use it like glue on the back of the picture, then arrange.
After that, you’re going to do a thin layer of Mod Podge over the picture and the frame in horizontal strokes. In case you’re like me and have a heart attack because you think you’re ruining your picture, relax! It dries clear!
These are the mounting brackets we used. They have a sharp point, so you can just push them into the back of your picture once it’s all dry. No hammers needed!
Viola! Your picture gift is completed! Wasn’t that easy!? Here’s my finished product! (Aren’t they cute?)
See…I told you it was easy.


I love this idea – and how easy it is! I’m such an uncrafter so I appreciate posts like this 🙂 THnaks so much for linking up to Freedom Fridays – I’ve pinned this!
Great, simple idea! Thanks!
Your frame turned out great! Can’t even tell you’re “not a crafter.” This would make a fun girls’ night project. Thank you for linking to the In and Out of the Kitchen Link Party. Hope to see you next week.
What a fun idea! Found you at Thrive@Home this morning. Have a blessed day!
Hi – I have done this on bathroom tiles. it works great you just cut the picture to fit the little square tiles. or use a big 5 x 7 photo and put on a bigger tile.
So cute!
I love Modge Podge! Coolest stuff ever. ( :
It is! And so fun to say 🙂
Great idea and so simple even I could do it. The Grandparents are going to LOVE getting these for Christmas. Thank you so much for posting this!
I’m so glad! Yes, so simple! 🙂
Another idea on the last minute list! Thank you! Easy peazy! (mmm appetizers)
It is so easy! And mine turned out great! If mine looked great, ANYONE’S can look great 😉